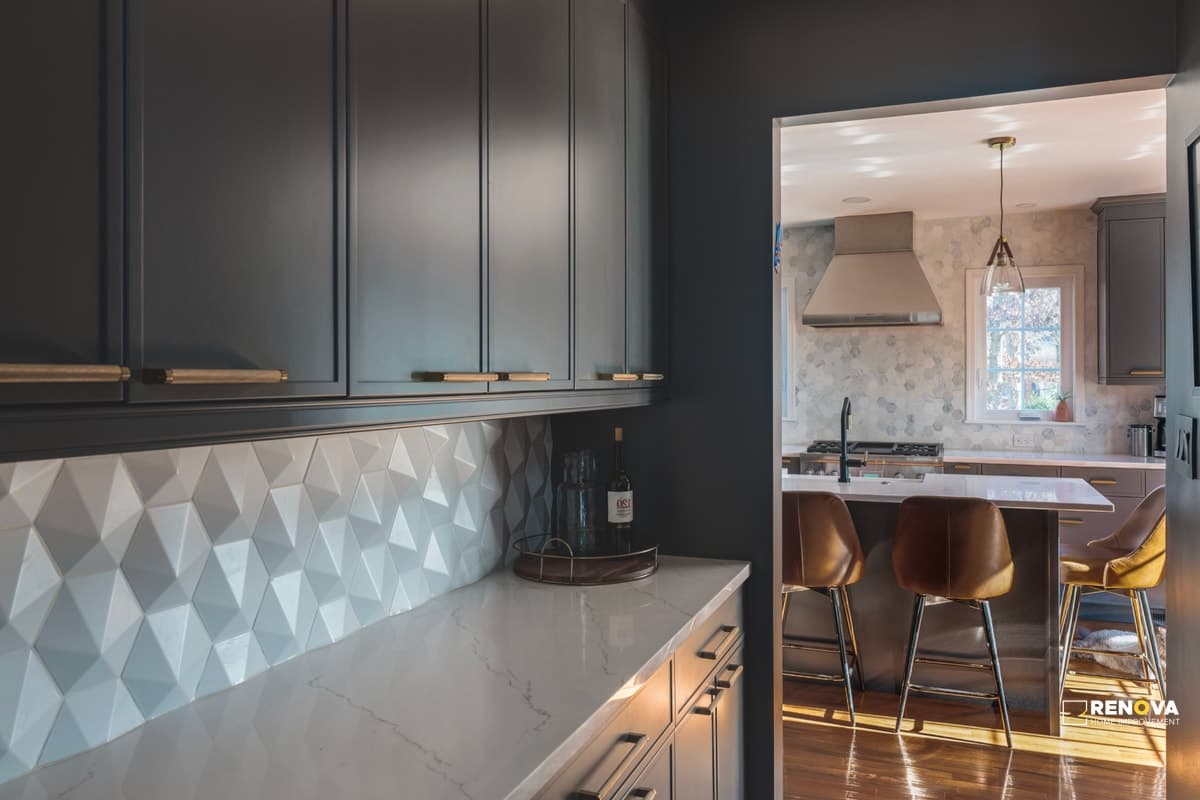
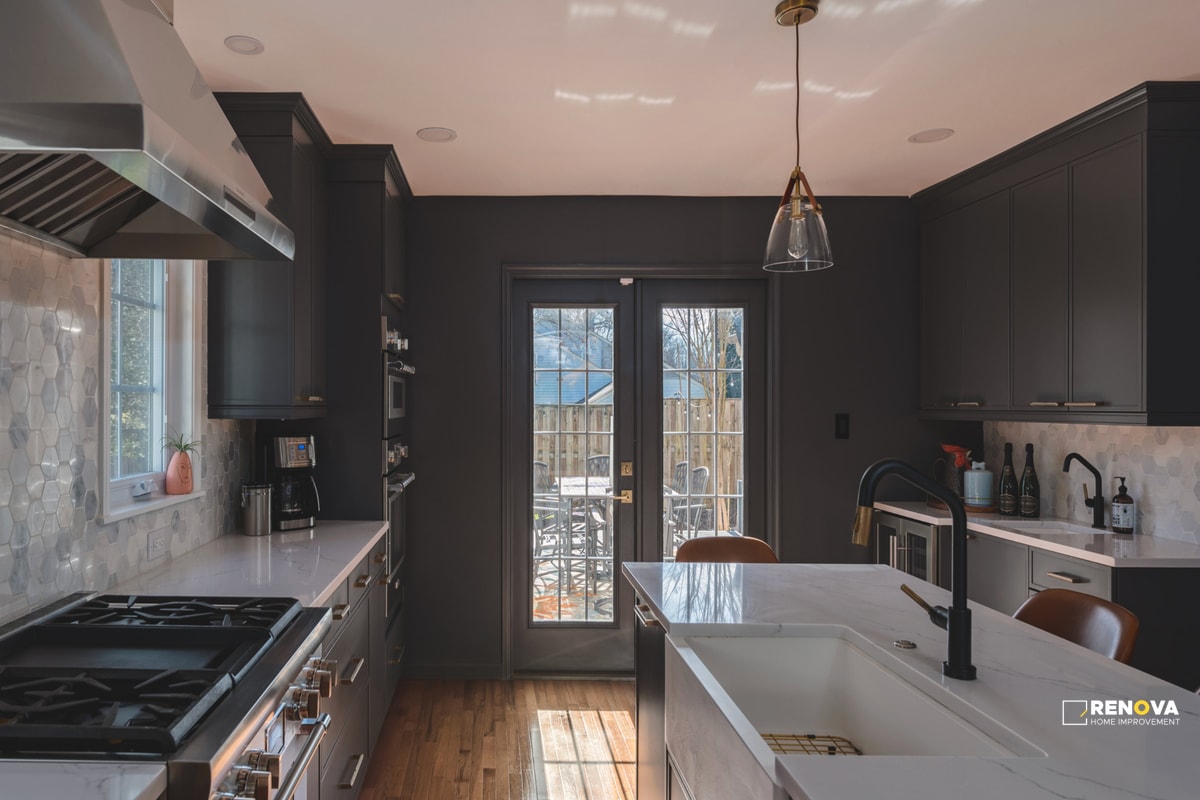
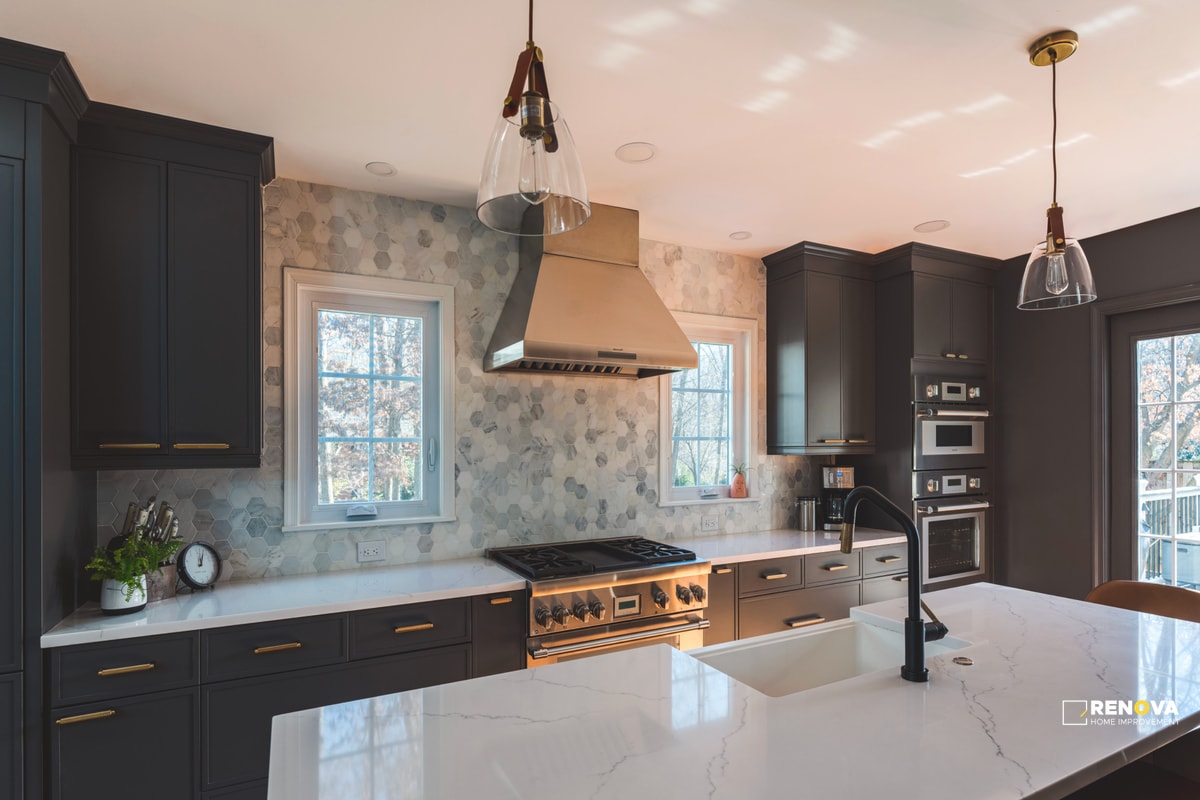
Bellevue kitchen, start to finish. We demoed to studs, corrected framing as needed, rewired to current code with GFCI where required, and replumbed for sink and dishwasher. The new layout keeps the work triangle tight and opens sightlines to the living area. Cabinets are frameless and dark, built with plywood boxes and soft-close hardware. White quartz counters and a full-height geometric tile splash add contrast and easy cleanup. A 36 inch range with a custom hood anchors the cooking wall. Stainless refrigerator and dishwasher balance the palette. The center island brings a prep sink and seating. We refinished the wood floors, verified appliance clearances, templated and set tops, installed and leveled the cabinets, set appliances, and closed the punch. This one is built for daily cooking and fast wipe-downs.


Project snapshot
- Location – Bellevue single-family home
- Timeline – 11 weeks, start to finish
- Scope – demolition to studs, electrical to code, plumbing updates, cabinet replacement, new countertops, full splash, flooring refinish, appliance set, final punch
- Goal – a durable, modern kitchen that cooks well and cleans fast
What changed and why it matters
- Function first – work paths are shorter, prep space is bigger, and the island carries the load for seating and storage.
- Light and contrast – dark cabinetry grounds the room while white surfaces reflect light. The space reads clean without feeling cold.
- Daily durability – plywood boxes, quality hardware, quartz counters, and a tile splash that handles steam and oil.
- Service access – shutoffs, outlets, and appliance clearances are reachable. Future swaps stay simple.
Cabinetry and storage
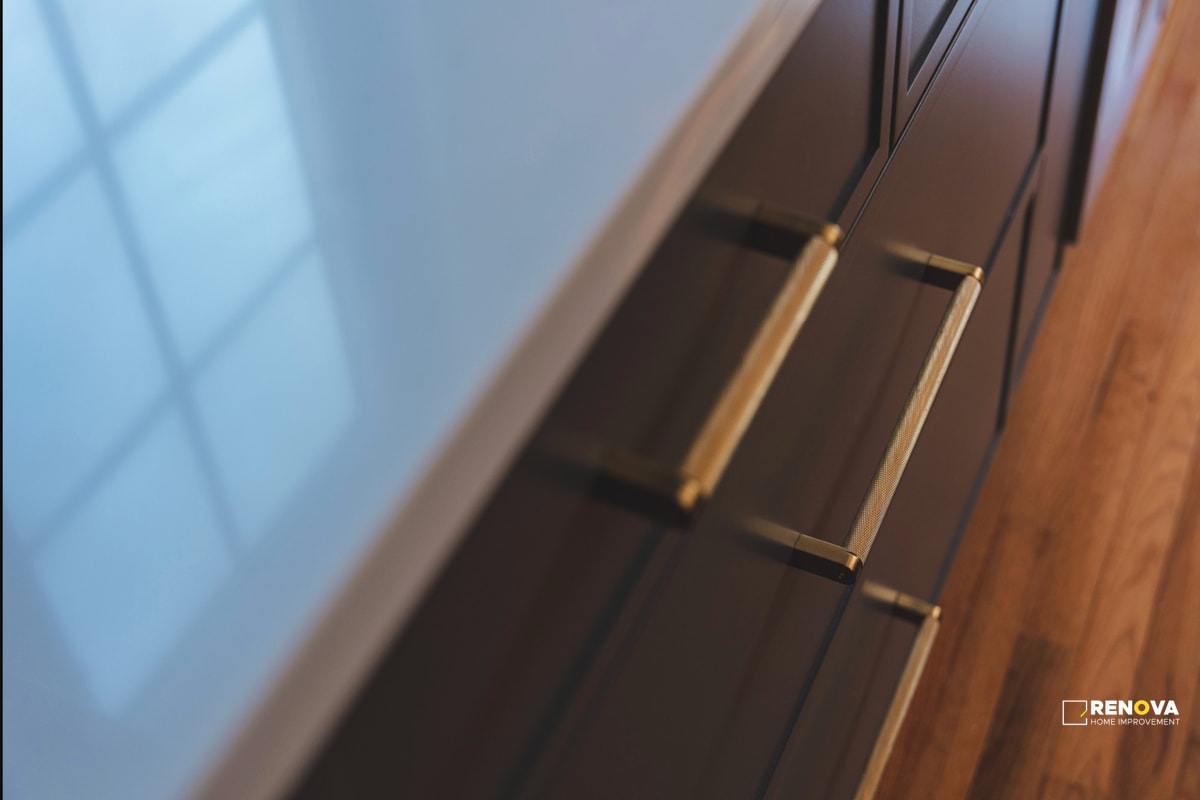
- Frameless dark cabinets – plywood boxes for rigidity, edge-banded doors and drawer fronts for a tight look.
- Soft-close throughout – slides and hinges tuned so drawers close straight and doors keep even reveals.
- Smart interiors – tray dividers near the range, trash and recycle pull-outs by the sink, deep drawers for pots under the cooktop zone.
- Tall storage – pantry organization with full-extension pull-outs keeps staples visible and easy to reach.
- Finish details – fillers and scribes resolve out-of-square walls, crown and light rail finish the lines, and end panels tie into the island seating.
Countertops and splash
- White quartz – consistent color, low maintenance, and the right mix of sheen and scratch resistance for a family kitchen.
- Full-height tile splash – geometric tile adds pattern without visual noise. The grout is sealed and easy to refresh.
- Seam planning – seams kept out of the eyeline and pulled tight. No seams through sink or cooktop cutouts.
- Edges – eased for comfort and chip resistance. Corners are slightly radiused to protect pockets and hips.
Appliances and ventilation
- 36 inch range – enough output for weeknight sears and weekend batches. Controls are clear and reachable.
- Custom hood – proper capture zone and ducting sized for the appliance. Make-up air considered so the door doesn’t slam when the fan runs.
- Stainless fridge and dishwasher – efficient, quiet, and easy to wipe. Panels around the fridge are scribed tight so crumbs don’t collect.
Electrical, lighting, and code work
- Rewire to current code – GFCI where required and correct circuits for range, dishwasher, microwave, and fridge.
- Layered lighting – cans for general light, pendants for the island, under-cabinet task lighting for prep. Warm color temp keeps the room comfortable at night.
- Switching and dimming – zones make sense. You can dim task lights without losing overall visibility.
Plumbing and fixtures
- New supplies and drains at the sink – clean runs, proper slope, and access that doesn’t steal storage.
- Prep sink at the island – speeds cooking and keeps traffic out of the main sink when more than one person is working.
- Quiet disposal and air gap – installed to spec, tested under load, and mounted to minimize vibration.
Flooring and transitions
- Wood floors refinished – color chosen to bridge the dark cabinetry and light counters. Finish system selected for abrasion resistance and spot repair.
- Clean thresholds – transitions to adjacent rooms are flush and tight so chairs don’t catch and vacuuming stays easy.
How we installed it
- Measure and layout – walls mapped, floors checked for flat, studs located. Shop drawings issued and approved before ordering.
- Materials ready – we scheduled demo only after cabinets, panels, fillers, and hardware were on site or confirmed at the yard.
- Site protection – floors covered, paths padded, dust contained. Pets considered and doors closed behind us.
- Set lines and hang uppers – level reference snapped, uppers hung first, bases set plumb and square, tall units anchored.
- Scribe and tune – fillers and panels are scribed to walls and floors. Doors and drawers adjusted until reveals run even.
- Template and tops – laser templating captured walls and corners within millimeters. Counters were cut on CNC, dry-fit, then set and sealed.
- Appliance set and test – clearances verified, connections made cleanly, and every function checked before the final wipe-down.
Day-to-day gains the owners feel
- More usable prep space – the island handles chopping, baking, and serving without blocking traffic.
- Faster cleanup – slab splash and quartz counters wipe down in minutes. Drawer organization cuts the hunt time for tools.
- Better cooking rhythm – the range, fridge, and sinks sit in a simple triangle. You can work solo or with a helper without bumping elbows.
- Quieter room – soft-close hardware and refined ventilation lower the noise floor.
Budget and choices that moved the needle
- Spend on structure – plywood cabinetry and quality hardware are worth it. They hold alignment and take daily use.
- Save with smart finishes – quartz brought durability and look without fragile maintenance demands.
- Pick lights once – a consistent color temperature ties the room together and saves on change-outs later.
- Design before demo – drawings, appliance specs, and fixture counts were locked before we opened walls. Fewer surprises, faster install.
What we’d repeat every time
- Plan seams before cutting – keep them out of sightlines and match pattern flow. The result looks custom because it is.
- Leave service access – shutoffs, outlets, and filters should not require gymnastics.
- Template after cabinets are tuned – tiny adjustments at install produce perfect countertops and a clean caulk line.
- Close with a punch – walk the space, list small fixes, complete them, and hand over care notes and a written labor warranty.
Thinking about your own kitchen
- Start with how you cook and clean. The materials follow the habits.
- Confirm appliance sizes and vent requirements early. Clearances drive the cabinet plan.
- Choose a cabinet line that can scribe tight and hold level in your house. Old floors and walls need real tuning.
- Put dollars into the parts you touch daily – hardware, drawers, lighting, counters.
Ready to plan your remodel in Bellevue or nearby cities? We’ll measure, draw, give you options, and schedule work when materials are truly ready. Simple, clean, built to last.